In the post below you will find the final accounting of this project. Please keep in mind that his is the cost to build my boat, with all three (3) rigs, A, B & C, back up servos, a sailbox and some other bits and peices that may be considered luxuries by others.
I will modify the list somewhat to show what can omitted, if you just want to get an idea on the bare minimum to take a hull and deck and build it with the A rig.
Thursday, December 31, 2009


New Receiver & Radio

My DX6i radio came in yesterday together with the new Marine MR3000 receiver. I went to the boat yard and we programmed the radio and linked the receiver. This new receiver has 2 antennae and one is about 8 inches long and the other 13 inches. After putting the Rx in the pot, I pushed the long antenna out the whole where the servo wires are fed and we ran it forward up to the servo mount. The other antenna we ran out a small whole in the back of the pot and let it hang in the stern of the boat. We dipped the exposed ends of the antennae with silicon to protect them from water and subsequent possible corrosion.
We also installed the the plastic clips that hold the rigs securely in place and installed some tie downs to better secure the rigs in the boat box. I sanded on the outside of the box and dusted it off. I will put on a second coat of the polyurethane this afternoon. Then i have to install a carrying handle, or 2. As noted we put in slots to hold the rudder and the keel and the box will have a different balance point if the box is loaded with the keel and rudder than if it doesn't.
We are also looking for a source for a good hasp/latch to hold the box together when it is closed.
I will get some pictures today of the items noted above and will post them.
Hope to get the hull cover and keel cover soon that I ordered from Windward Sailing. When these come in I will certainly post some pictures.
Wednesday, December 30, 2009
Adrian's Sail Box


Here are some photos of Adrian's sail box that he sent to me to give some ideas for handling the interior of my sail box.
Saturday, December 26, 2009
ALMOST FINISHED
Well, did an inventory of what still need to be completed with this boat and it seems I am almost done with this boat and project.
1 - I need to order some blocks to better engineer the bungee that holds the tension on the sheeting system.
2 - Check final weight of keel and hull to ensure all is in order, I may have to add weights to the B and C rigs to make the whole boat, rig come to minimum weight if it comes in less.
3 - Complete sail box. I ordered some clips from West Marine that will hold the rigs in place, and then need to figure out a way to secure rigs on place using rubber bands, bungee cord, hooks and eyes etc.
4 - Get the rigs measured in and the hull.
5 - I did order a hull cover and a keel cover from Chuck LeMahieu of Richardson, TX (his website is listed as a link on this blog)
6 - I also ordered a new DX6i radio with the new marine receiver MR3000
This was a great project, although it took much longer than I expected, but at the end of the day, I built this boat with my own two hands! I do not know if the boat will be competitive or not, but I feel it is the sailor who is good, not necessarily the boat.
Sail Box
 SAIL BOX with slots fitted to hold Keel and rudder
Worked on the sail box some more on Wednesday together with Al and Collin. We looked at some photos of Adrian's sail box and decided to put in a slot to hold the keel and rudder securely. I still need to find some clasps to hold the box closed securely and a carry handle.

Sail box view of the inside before 3rd panel installed
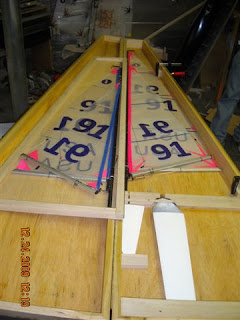
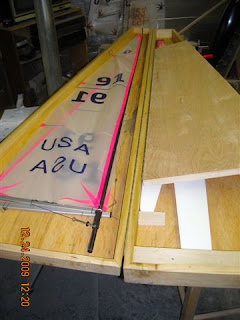
Panel for 'C' rig and the 'B' rig on the back panel. Also slots for keel and rudder
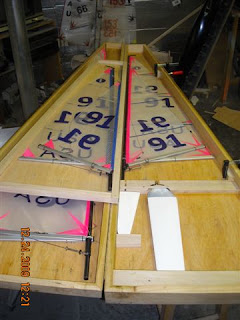
Here you can see the 'A' rig on the inside of the front panel and the 'C' rig located on the inside panel and the 'B' rig on the back panel as well as the keel and rudder.
Below - you can see this with the inside panel closed and only the 'A' rig accessible.
Tuesday, December 22, 2009
Sail Box and other Items
Last night I had a few hours to myself so I went to the boat loft and put a coat of sealant on the inside of the sail box. I am not sure when I will have the time to work on the box again as extremely busy with work.
I also bought some permatex silicon and used it to attach the bow bumper to the stem. I will see how this stuff holds up, this is the stuff that the guys in Vancouver use.
It was also discovered that the bungee I was using to keep tension on the sheeting system broke and figured this was due to how it was run, too much friction in one location. I will have to figure out a way to rig this bungee.
I also got some wire so I can hard wire the on/off switch and the new batteries arrived.
Monday, December 7, 2009
Sailing Picture
 Al took this photo with his new camera. Here the #91 is ahead of Adrians #55 - Both Vektor hulls.
Tuesday, December 1, 2009

Sail Box (Continued)
 Sail box before slicing in half
 Sail box after cutting in half
 Sail box after cutting in half
Sail box with piano hinge installed

Yesterday we cut the sail box on half lengthwise to make two halves. I then installed the piano hinge. Today I will put a coat of polyurethane on the inside of the box and then this afternoon we will do some work on the inside. This box will hold all three rigs so an extra panel will be installed on the inside with another piano hinge for holding the C rig. Stay tuned for more pictures on this project.


Monday, November 30, 2009


Sail box


 Here are two photos of the sail box I have been working on. The design is the same as Al's, and it will hold all three rigs. More details to follow once I make more headway on this project.
PVC boat stand
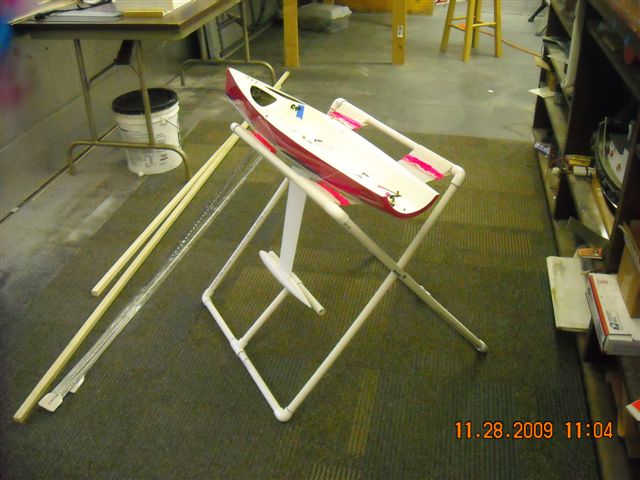
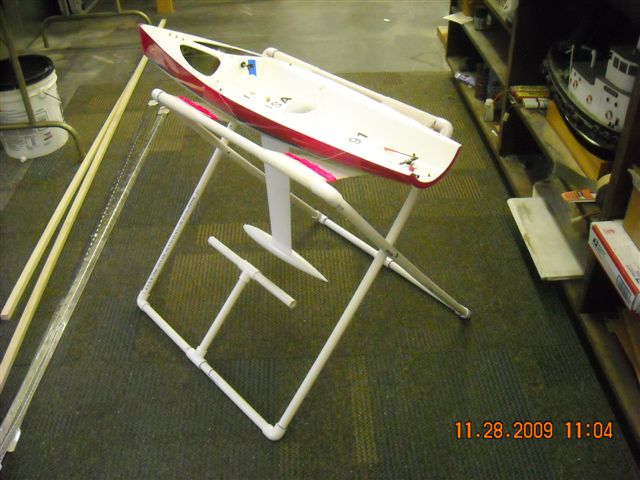
Here are a couple of shots of the PVC boat stand I put together. You will not a 'T' coming off the bas of the legs, this is to support the keel, putting the boat at angle of heel to see the shape of the sails better.
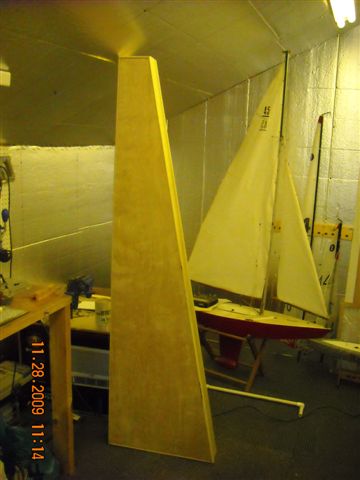
Saturday, November 28, 2009
Video
http://www.youtube.com/watch?v=Gty-9h3L5qo&feature=channel
The above link to youtube shows the veiw from onboard Dave's boat. Hew has a small video camera that we tape on to a boat.
The above link to youtube shows the veiw from onboard Dave's boat. Hew has a small video camera that we tape on to a boat.
Boat stand and sail box
Yesterday I went to the boat loft and built a boat stand out of PVC pipe and started to build my sail box. I will post pictures later this weekend.
The boat stand is made from 1/2 inch PVC pipe and some elbows and a couple of 'T' fittings. I used some type of rubber shelf liner for the 'hammock' that supports the hull. This cost less than $10.00 to make.
The sail box is made from 1/4 inch plywood and 1 x 6 poplar boards and 2 piano hinges at 6 foot length each. This box will hold all three rigs. I will post more details of the box and some photos later this weekend.
Today I will continue to work on the sail box and try to knock out some of the other items on my list of things to complete to finalize this boat.
Sunday we are planning on sailing IOM's at the lake front.
Tuesday, November 24, 2009
A-Rig Cunningham
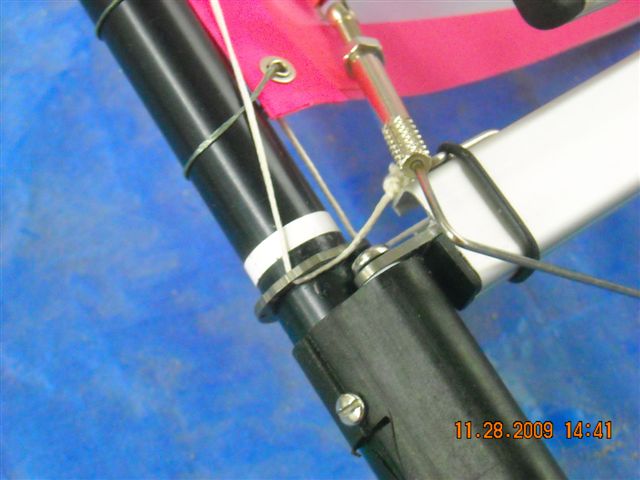
Today I put the Cunningham ring on the mast of the A-Rig. In order to do this I had to take the boom off and then remove the spreaders so i could take the mast apart at the joint. I slide the mast out of the sail hoops and then put the ring on the mast below the white stripe and above the gooseneck. I used some CA to hold it in place. I also had to reattach the head of the main to the top of the mast, it was set too low before. After doing this Adrian showed up to the boat loft and soon after Dave also arrived. I put the rig back to together and installed sliding hooks for the adjustments to the Cunningham, these are the sliding hooks that are used for the the sheet attachments, they require an Allen wrench to tighten and loosen, but i think i prefer this method over the bowsie I was using before. I also replaced the bowsie on the Job Boom for the down haul with one of these sliding hooks. Like a big dummy, I forgot to put on draft stripes on the main! Will try to get to this this weekend.
I need to do all of the above to the B-rig too!
I am hoping I won't have to work this weekend and I can build my sail box. Ordered the clips to hold the masts from West Marine and they should be here next week. The sail box will hold all three rigs.
I need to do all of the above to the B-rig too!
I am hoping I won't have to work this weekend and I can build my sail box. Ordered the clips to hold the masts from West Marine and they should be here next week. The sail box will hold all three rigs.
Sunday, November 22, 2009
Pictures from sailing Sunday, November 22, 2009
 VEKTOR - #91
 VEKTOR 91 crossing the stern of Mike's own design 'GOLLYWOMPUS'
 VEKTOR 91 & 66 around the mark, GOLLYWOMPUS in the middle
Batteries
I order 4 sets of batteries from all-battery.com this evening. These are 6 volts, 2000 mAh NiMH for $8.99 each!
We sailed this morning at the lakefront and she did OK, but she did better after Hew tuned the boat a bit. 'They' let me win the last race so I will have to come out again real soon!
Made a list of things to do to in order to complete the boat once and for all.
1) Finish the C rig - Connect Jib to mast
1) Wire switch and make all electrical connections
2) Install mast ring and re-run cunninghams on both the A rig and the B rig, using hooks and track-slides instead of bowsies
3) Put draft stripes on all 3 mains
4) Re-run downhauls on all three jibs - remove bowsies and use hooks/track-slides
5) Make a boat stand out of PVC piping
6) Build a sail box to hold all three rigs
7) Build a box to hold the hull, with places to secure the rudder and keel/bulb
Now Al is making a mold of the NOUX II and i am sure one of these days i will want to build one of those just so i can keep up with the fleet!
Saturday, October 10, 2009
C rig

I almost finished completing the C rig this morning. I did however attach the mainsail to the mast and boom. I need to connect the wire headstay to the mast, but require a second set of hands to do this properly. This will have to wait until Al gets back from racing Victoria's in San Antonio.
Thursday I drilled out 2 more holes in the lead bulb in order to reduce the weight of the keel/bulb. These holes were filled with Styrofoam peanuts and then epoxied over. This morning I sanded off the excess epoxy. The keel/blade now just needs the 'once over' from Al and then some touch up paint and final sanding and polishing.
Dave ordered some more parts from Mid-west Model Yachting and I ordered some extra parts and pieces for the boat. The order should be here next week. I ordered some bowsies, some silicon drain plugs, block to replace the one I 'borrowed' from Al and the auto ease Cunningham rings. I also order extra boom slides with hooks that i will use for my downhauls. I think I prefer this method over a bowsie as it is easier to adjust, just requiring an allen wrench.
Subscribe to:
Posts (Atom)